
How to work with Retool's custom component?
Retool does provide a list of components that can full fill any data representation needs. But still, there are some scenarios where you want to work with a custom component, or maybe you want to integrate a legacy component in your new Retool dashboard.
For these needs, Retool provides a custom component. You can create ReactJs-based components using this custom component and JS-based components with a mixture of HTML.
According to my personal experience and existing Retool documentation, I discovered that some information is missing. And most of the time, when a developer starts working with this component, they face these challenges repeatedly.
- Pass Data to Retool’s custom component
- Pass data from your Custom Component to your app
- Triggering query from Retool’s custom component
We will see these topics individually and try to understand how we can work with this brilliant component. So let’s get started.
Pass Data to Retool's custom component.
In a custom component, you have to pass data to your component. You can hardcode this data or refer any query to this component. The second part is the IFrame code. To render, you must write an HTML-based code in the IFrame Option. You can write Plain JS events and also React component code.
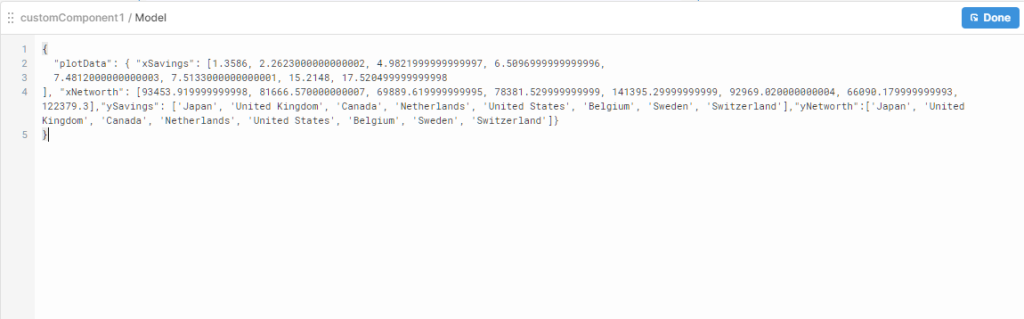
In this example, I have provided some Dummy data in the Model option to render a Plotly custom component.
Let’s break down the IFrame code for better understanding. If you’re familiar with writing HTML pages, this part will be a piece of cake for you.
First, you can define the Style of your component using < Style> tags. The second part would be your CDN libraries and packages, as you can see from Retool’s documentation.
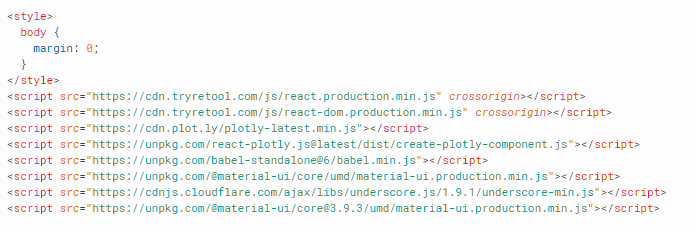
The rest of the code is pretty self-explanatory. I took this example from a Plotly website.
					<script type="text/babel">
  const Plot = createPlotlyComponent.default(Plotly);

 var xSavings=[];
 var xNetworth=[];
 var ySavings=[];
 var yNetworth=[];

window.Retool.subscribe(function(model) {

 xSavings = model.plotData.xSavings;
 xNetworth =  model.plotData.xNetworth;
 yNetworth =  model.plotData.yNetworth;
 ySavings =  model.plotData.ySavings;
      });

 var trace1 = {
  x: xSavings,
  y: ySavings,
  xaxis: 'x1',
  yaxis: 'y1',
  type: 'bar',
  marker: {
    color: 'rgba(50,171,96,0.6)',
    line: {
      color: 'rgba(50,171,96,1.0)',
      width: 1
    }
  },
  name: 'Household savings, percentage of household disposable income',
  orientation: 'h'
};

var trace2 = {
  x: xNetworth,
  y: yNetworth,
  xaxis: 'x2',
  yaxis: 'y1',
  mode: 'lines+markers',
  line: {
    color: 'rgb(128,0,128)'
  },
  name: 'Household net worth, Million USD/capita'
};

var data = [trace1, trace2];

var layout = {
  title: 'Household Savings & Net Worth for Eight OECD Countries',
  xaxis1: {
    range: [0, 20],
    domain: [0, 0.5],
    zeroline: false,
    showline: false,
    showticklabels: true,
    showgrid: true
  },
  xaxis2: {
    range: [25000, 150000],
    domain: [0.5, 1],
    zeroline: false,
    showline: false,
    showticklabels: true,
    showgrid: true,
    side: 'top',
    dtick: 25000
  },
  legend: {
    x: 0.029,
    y: 1.238,
    font: {
      size: 10
    }
  },
  margin: {
    l: 100,
    r: 20,
    t: 200,
    b: 70
  },
  width: 600,
  height: 600,
  paper_bgcolor: 'rgb(248,248,255)',
  plot_bgcolor: 'rgb(248,248,255)',
  annotations: [
    {
      xref: 'paper',
      yref: 'paper',
      x: -0.2,
      y: -0.109,
      text: 'OECD ' + '(2015), Household savings (indicator), ' + 'Household net worth (indicator). doi: ' + '10.1787/cfc6f499-en (Accessed on 05 June 2015)',
      showarrow: false,
      font:{
        family: 'Arial',
        size: 10,
        color: 'rgb(150,150,150)'
      }
    }
  ]
};

for ( var i = 0 ; i < xSavings.length ; i++ ) {
  var result = {
    xref: 'x1',
    yref: 'y1',
    x: xSavings[i]+2.3,
    y: ySavings[i],
    text: xSavings[i] + '%',
    font: {
      family: 'Arial',
      size: 12,
      color: 'rgb(50, 171, 96)'
    },
     showarrow: false,
  };
  var result2 = {
    xref: 'x2',
    yref: 'y1',
    x: xNetworth[i] - 20000,
    y: yNetworth[i],
    text: xNetworth[i] + ' M',
    font: {
      family: 'Arial',
      size: 12,
      color: 'rgb(128, 0, 128)'
    },
     showarrow: false
  };
  layout.annotations.push(result, result2);
}

Plotly.newPlot('react', data, layout);
</script>
Look closely at this part. We can easily access our Model input inside our IFrame code using “Retool.subscribe” Method.
					 var xSavings=[];
 var xNetworth=[];
 var ySavings=[];
 var yNetworth=[];

window.Retool.subscribe(function(model) {

 xSavings = model.plotData.xSavings;
 xNetworth =  model.plotData.xNetworth;
 yNetworth =  model.plotData.yNetworth;
 ySavings =  model.plotData.ySavings;
      });

So now you learned how you could pass data to Retool’s custom component. Now Let’s talk about how we can Pass data from your Custom Component to your app.
Pass data from your Custom Component to your app
Using the model update method, you can pass data from your custom component to other components. If you’re developing a non-React custom component, use the following Method.
					 function updateName(e) {
        window.Retool.modelUpdate({ name: e.target.value });
      }
Trigger queries from your Custom Component
Using the trigger query method, you can pass the query as a parameter you want to run.
					 function buttonClicked() {
        window.Retool.triggerQuery('query1')
      }
Conclusion
The retool engineering team is constantly updating their existing components and building new ones. But every use case has its requirements. Custom components are always there to full fill special requirements.
Passing data to Retool a custom component, Passing data from a custom component to another component and Triggering a query from one custom component is very easy. By combining these three features, you can develop any custom component in Retool.